2.27.2013

PB Letter Bins:

My Husband and I went rocking climbing in Fredericksburg last November.  While we were there, we stopped into a Goodwill Store.  I noticed these 2 "filing cabinets"  (Pottery Barn calls them "Letter Bin"), and knew they just had to be Pottery Barn!  Sure enough, they were!  I later looked up how much they cost on the Pottery Barn website...$54.00 each!!!  
I bought them for $5.99 each!  Score!!!


It's now almost March, and we JUST now installed them!

In order to properly install the "Letter Bin", you need a Display Rod.  These cost $12.00 each, but they're on sale right now for $10.00.  I also had a coupon that I used, which brought them down to $8.50 each.  After tax and shipping, yes, I ended up spending more on the "rods" than the actual letter bin!

Daily System - White

Oh well.  What would have cost me a total of $132.00, I only spent $29.00!

Okay so, check out how cool this is!!!  They actually included a "mounting template"!!!  
This made it sooo easy!!!


My husband just took the screw, and jabbed through the paper into the wall to mark where he would be placing the screws...


...and these just slide right on in...


Here's how the little kitchen nook looks right now...


I'm thinking about painting/distressing the pallet shelves a bit, and I for sure what to paint all of the cabinets in the Kitchen!  Some day. =)

Thanks for looking!

~ Jenny xoxo


2.21.2013

Hanging Lanterns...

I love it when my Sister wants to sell some of her stuff, because that usually means I get first dibs!  Take for example, these vases...

She was selling these for $5 each, but I was able to barter with her.
In exchange for these lovely vases, I will paint some more furniture of hers! 
Great deal, eh?


Wanna see what I did with them??


I hung them from the Cupola part of the Gazebo...


My cat decided to make an appearance in this next picture...can you spot him?


I brought out my Dining Room table so that you could see what my future intentions are...

I would like to have a table go underneath the lanterns for outdoor gatherings.  
I'm not sure if I'm going to build a table, or if I come across a cheap one that I can up cycle, I may go that route.  We'll see! =)


Thanks so much for looking!!! =)

Stay tuned...I'll be posting all about the sign you see in the background of these pictures.

~ Jenny xoxo


2.18.2013

Recipes on Display...

This is something I've been wanting to do for a little while now...

Framing/Displaying some of my favorite recipes of my Mom's! 

When I'm making an unfamiliar recipe, I will usually have my phone of laptop near by with the recipe on the screen!  Then there are times when I'm making a special dinner, and want to bring out my Mom's recipe box!  Most of them are handwritten on cards, paper, or even envelopes!  They usually get laid down on the counter, and end up getting splattered with whatever ingredients I am working with!
Not anymore!...now I can easily clip them up on the wall, and they are easily accessible! 

Ultimately I would REALLY love one of those Recipe Typographic prints. 
Have you seen those?
They look something like this...

Typographic Dessert Recipe Prints by Leanda Zavian of One Little Bird Studio

When making the frame, I just used what I already had on hand.

These frames were on my refrigerator with magnets behind them.  I'm actually doing something different with my refrigerator now, so I no longer needed the frames.

I bought these at Hobby Lobby for $14.99 with a 1/2 off sale!...so $7.50 each!


I found these bamboo table mats from Target a while back on sale.  I'm not really a "table mat kind-of-gal, so they just sat in a drawer.


I cut the bamboo strips to fit inside the frame...


...then I used the hot glue gun to adhere them!


I glued down a clip as well, added the recipe, and there you have it!!!


Thanks for looking!

~ Jenny xoxo

2.17.2013

Kitchen Progress...Paint & Wooden Blinds!

This past week I have been working on painting the Kitchen and Dining Room.  We also replaced the white blinds to faux wooden blinds.

I fell in love with the color from the HGTV Dream Home called Hearts of Palm by Sherwin-Williams.


Here's another angle...


Still LOTS to do, but I thought I'd give y'all an update on how it's coming along...

~ Jenny xoxo


2.09.2013

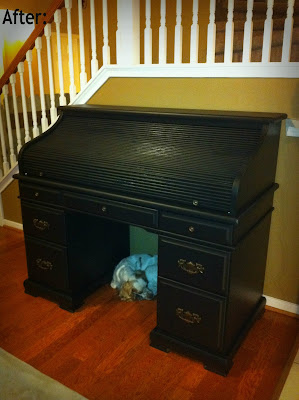
Painted Antique Desk:

The day after I painted the piano (you can read ALL about that here), I went back to my Sister's house and painted her antique desk.


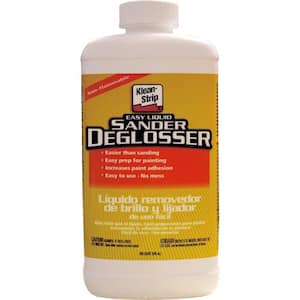
Recently I've started using Easy Liquid Sander Deglosser.
"...easy alternative to sanding by hand." is what the product description gives.
I'm not sure how exactly it works, but if it's going to save me time, I'm using it! ha ha
After the recommended 10 mins. dry time, it almost leaves a bit of a sticky, rougher feeling.


For the inside of the desk where all of the shelving is, I actually spray-painted those hard to reach places.  Everything else I painted with a brush.
I have tried several different types of brushes when painting furniture, and I have found that I like this one the best.  It has a short handle, and an angled brush.  Very easy to use!  


I used a Satin black paint, along with Satin black spray-paint.
Even though they were both "satin", they still have a different finish to them.
So I try to paint as much as I can with the brush, and try to use the spray paint in all the places you're really not going to see anyways.


...and now for the finished piece!

I hated to wake the puppy up from her beauty sleep...ha ha


Thanks for looking! =)

~ Jenny xoxo


2.04.2013

Painted Piano

This piano has been in our family for a very long time...since we were kid's!  Once everyone grew up, and started their own families, the piano went to my Sister.

It's a bit worn down, the legs have been chewed up by various dogs, and I'm sure it's due for a tune-up!  When visiting over at my Sister's house, the piano just kind of blends in, wasn't really a prized possession that it used to be.

After she saw what I did to the rocking chair, she asked if I could do the same with the piano.

So here it is!!!


I first wiped down the whole piano with Liquid Sander Deglosser...


The next set of pictures are just "progress"...
It took about 3 coats of Satin Black Paint.

When I'm painting furniture, I paint horizontally...in one direction.

((...and if you're wandering, that is a hand-made fence she built for her stairs that you see through the mirror of the piano))


...and now for the finished Piano!!!


I gave the accent angles a golden glaze...


...and here's a side-by-side picture for you. =)


If you like the black furniture...you can also check out these pieces...


Thanks for looking! =)

~ Jenny xoxo