I am so excited to share with y'all this next project!
Oh. My. Goodness!
Seriously...y'all will be driving to a Goodwill Store ASAP when you see how cheap and easy this project can be...
...but yet...so rich and elegant!
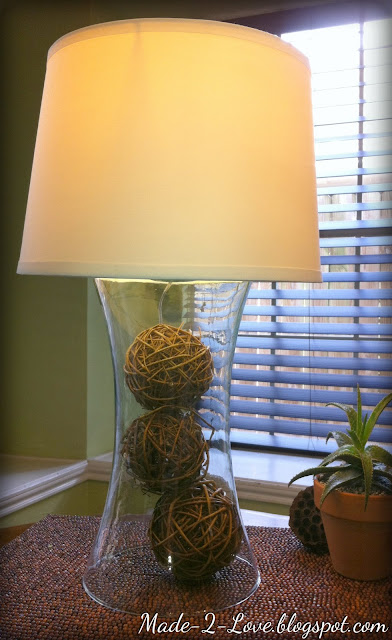
Have you seen these?
They have some at Pottery Barn that range in price from $120 - $170!!!


Well, I'm going to show you how to make one for under $20.00 bucks!
((It may be more of less depending on your price for vase/lamp shade))
I found my glass vase from a Goodwill Store for $3.99. You can also find lamp shades there as well, but I already had one on hand.


First you're going to separate the socket, and drill a hole big enough to fit the cord through. I used my electric drill and a drill bit...

For this next part, you can either read the included instructions. Or if you're like me, and you're a very visual person and need pictures...proceed...
Separate the cord's two wires (it says with a razor blade or utility knife, but I just very carefully tore them apart.), and tie them into a Underwriter's Knot.
Hopefully you can kind of tell from the picture how to do so, if not...here's a great YouTube video tutorial I found...
How To Tie an Underwriter's Knot:
http://www.youtube.com/watch?v=KHRaRRWW34w


I found my glass vase from a Goodwill Store for $3.99. You can also find lamp shades there as well, but I already had one on hand.

Supplies Needed:
(I bought my supplies from Lowes, so prices may vary)
- Gorilla Glue (dries white) $3.97
- Turn Knob Socket $4.28
- Lamp Cord $5.98
- 3 Washers $.14 cents each

First you're going to separate the socket, and drill a hole big enough to fit the cord through. I used my electric drill and a drill bit...

For this next part, you can either read the included instructions. Or if you're like me, and you're a very visual person and need pictures...proceed...
Separate the cord's two wires (it says with a razor blade or utility knife, but I just very carefully tore them apart.), and tie them into a Underwriter's Knot.
Hopefully you can kind of tell from the picture how to do so, if not...here's a great YouTube video tutorial I found...
How To Tie an Underwriter's Knot:
http://www.youtube.com/watch?v=KHRaRRWW34w

Next you need to strip the ends of the lamp cord just a smidge.
I read to use wire cutter/strippers (but I do not own those), instead I very carefully snipped away some of the installation with regular scissors.
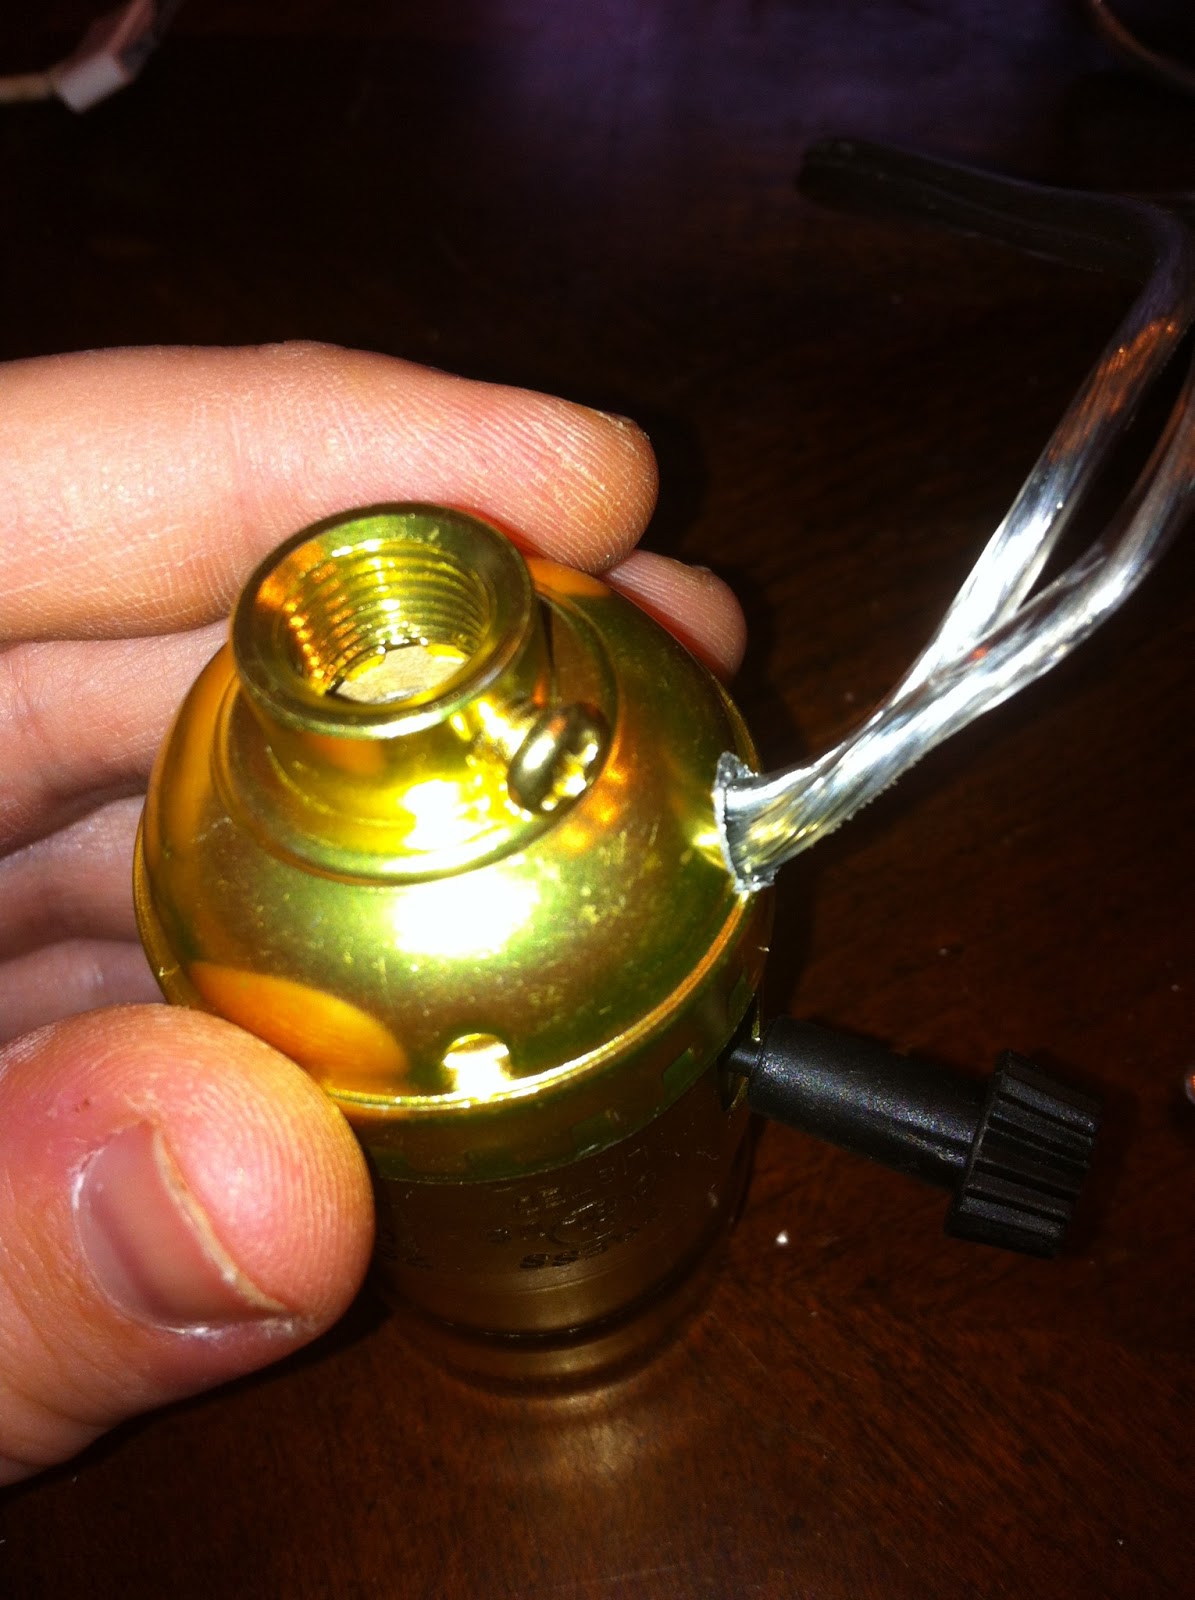
Next step: You will then need to unscrew the screws that are attached to the socket. Wrap the wires around the screw, and then tighten back up.
Okay, on the instructions...it says the "neutral wire (ribbed) should be connected to the silver colored screw and the other wire should be connected to the brass colored screw on the socket"
So if you are clueless like ME...how are you supposed to know which wire is "neutral (ribbed)" ??!!
So I did my research (you're welcome), and here's one way of finding out...
"...connecting the hot wire to the hot terminal and the neutral wire to the neutral terminal. The Hot Terminal will have a brass screw and the hot wire will be located on the side of the plug with the narrowest blade."

After the wires are wrapped, it'll look like this...

...and then just tighten the knot up a bit, and close it all back up...

A little side note: Once I screwed on a bulb, and tried to plug it in the wall, it sparked! After attempting this twice, I ended up taking this to Lowes to have it further inspected. My socket ended up being defective, (which he said he's never seen a defective socket before!) but he said I did everything right.
Next Step: I needed a flat base to be able to glue down to the vase.
I snipped off the bottom of the socket with some pliers, (or if you can find washers big enough to wrap around this piece, then you can skip this step)


Glue your 3 washers together with your Gorilla Glue, and glue down to the bottom of your vase...
Let this dry a little before adding your socket.
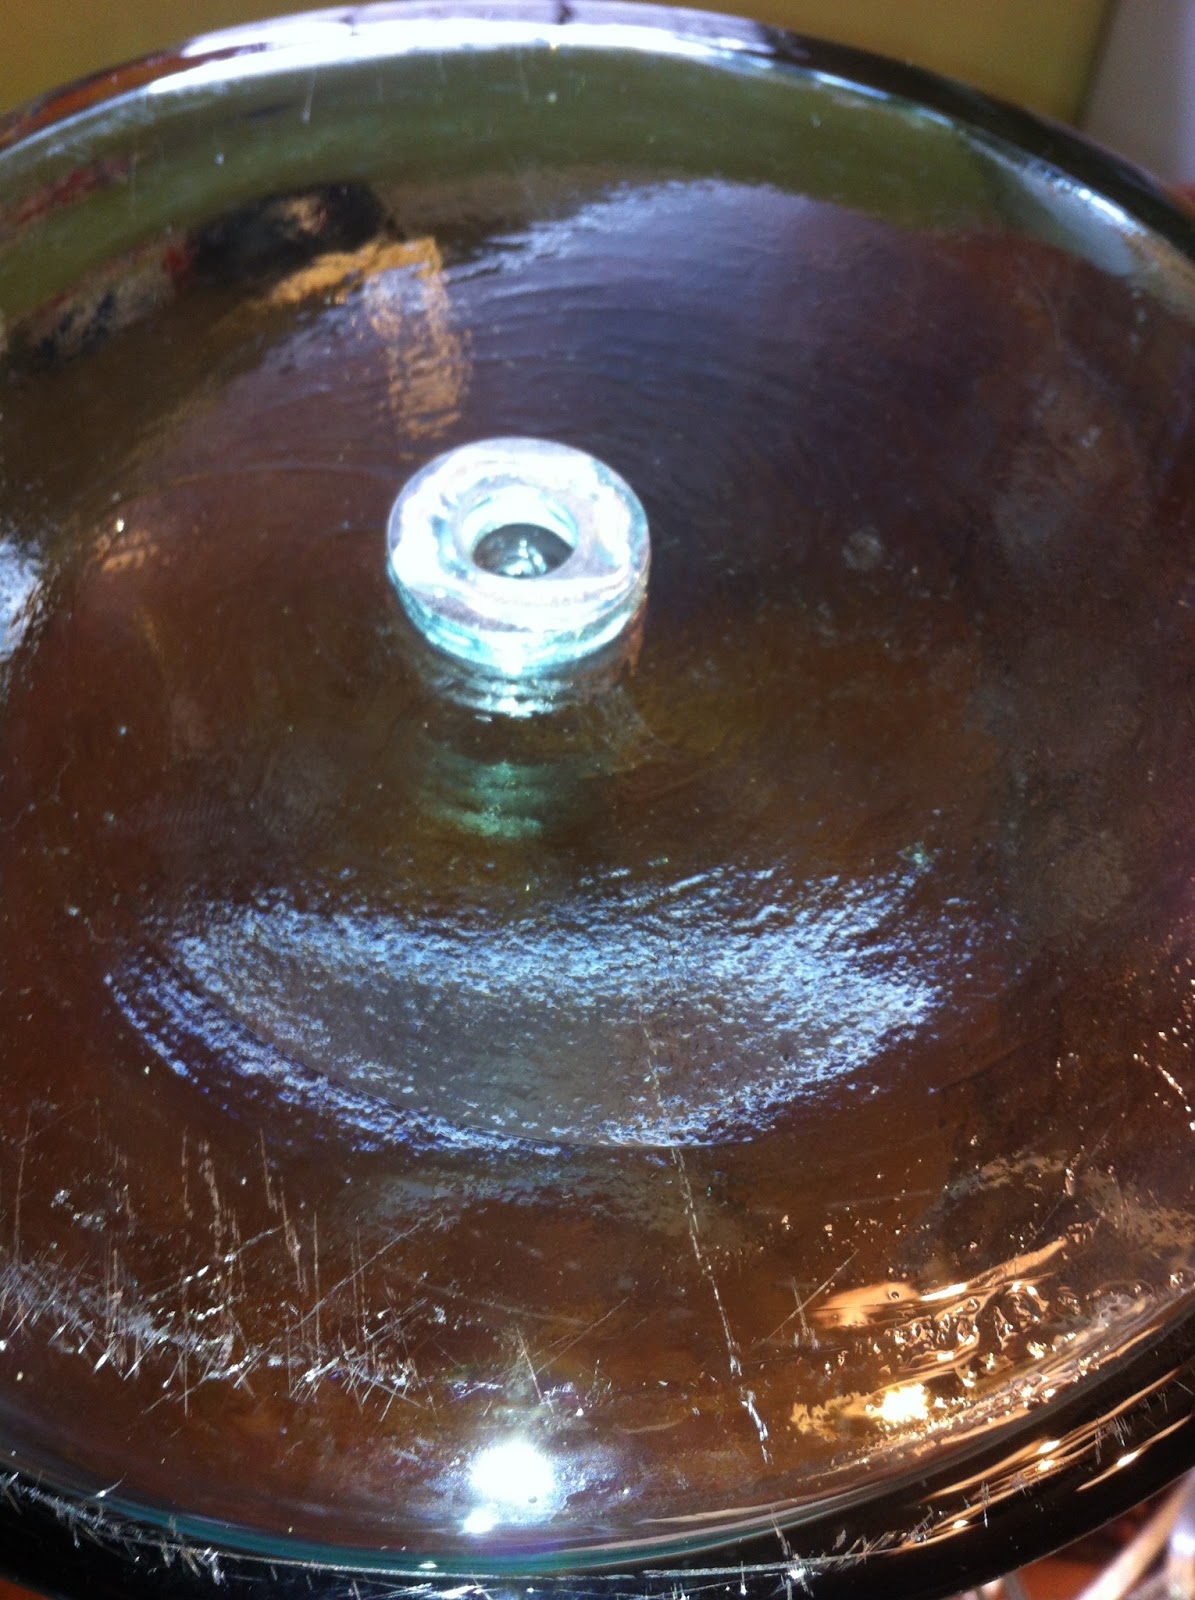
Once the washers have dried into place, glue the bottom of your socket to the washers.
Honestly, the washers are not really needed unless you find some big enough that wrap around the socket. If you're going to end up snipping the end piece off anyways, then what really is the point in needing washers?
After gluing down the socket, stretch some tape across it to hold in place until it's dry.

Add your lamp shade and bulb, and there you have it!!!


This is now sitting in my Study. =)

I hope I didn't completely confuse y'all! There are LOTS of websites and YouTube videos if you need help. You can also get someone in Lighting at Lowes or Home Depot to help you.
Hope y'all have a blessed week!
~ Jenny xoxo
No comments:
Post a Comment