Showing posts with label PaintedFurniture:. Show all posts

2.09.2013

Painted Antique Desk:

The day after I painted the piano (you can read ALL about that here), I went back to my Sister's house and painted her antique desk.


Recently I've started using Easy Liquid Sander Deglosser.
"...easy alternative to sanding by hand." is what the product description gives.
I'm not sure how exactly it works, but if it's going to save me time, I'm using it! ha ha
After the recommended 10 mins. dry time, it almost leaves a bit of a sticky, rougher feeling.


For the inside of the desk where all of the shelving is, I actually spray-painted those hard to reach places.  Everything else I painted with a brush.
I have tried several different types of brushes when painting furniture, and I have found that I like this one the best.  It has a short handle, and an angled brush.  Very easy to use!  


I used a Satin black paint, along with Satin black spray-paint.
Even though they were both "satin", they still have a different finish to them.
So I try to paint as much as I can with the brush, and try to use the spray paint in all the places you're really not going to see anyways.


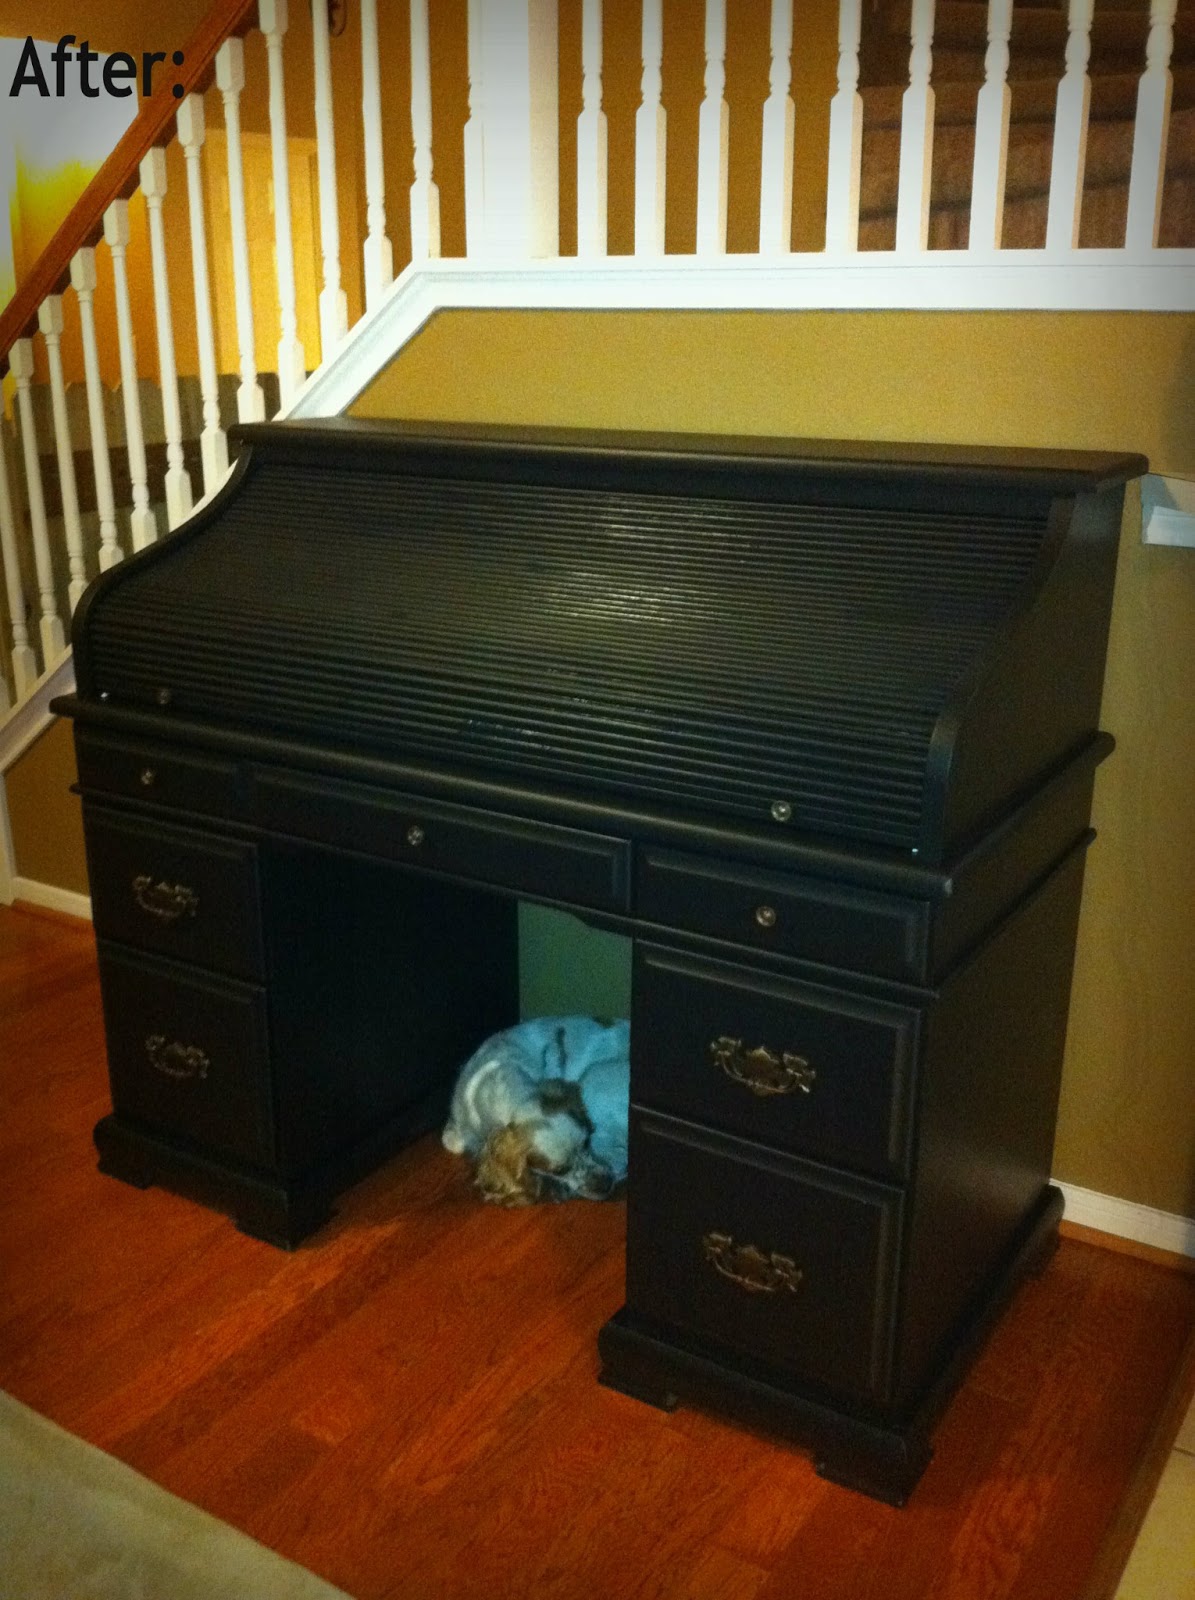
...and now for the finished piece!

I hated to wake the puppy up from her beauty sleep...ha ha


Thanks for looking! =)

~ Jenny xoxo


2.04.2013

Painted Piano

This piano has been in our family for a very long time...since we were kid's!  Once everyone grew up, and started their own families, the piano went to my Sister.

It's a bit worn down, the legs have been chewed up by various dogs, and I'm sure it's due for a tune-up!  When visiting over at my Sister's house, the piano just kind of blends in, wasn't really a prized possession that it used to be.

After she saw what I did to the rocking chair, she asked if I could do the same with the piano.

So here it is!!!


I first wiped down the whole piano with Liquid Sander Deglosser...


The next set of pictures are just "progress"...
It took about 3 coats of Satin Black Paint.

When I'm painting furniture, I paint horizontally...in one direction.

((...and if you're wandering, that is a hand-made fence she built for her stairs that you see through the mirror of the piano))


...and now for the finished Piano!!!


I gave the accent angles a golden glaze...


...and here's a side-by-side picture for you. =)


If you like the black furniture...you can also check out these pieces...


Thanks for looking! =)

~ Jenny xoxo


7.14.2012

Distressed End Table:

I'm going to need to restrain myself from "distressing" all of my wood furniture, because I am totally in love with this technique.  If you haven't already, you should try it!  It is super easy, and there is just something about it that is so therapeutic!  Maybe it's because nothing has to be perfect?

So this morning I got an early start, before the kid's were even awake, and I went and grabbed my end table, and started painting away!!!

See what it looked like before?  Like this orange-ish wood color that didn't match any of my furniture.  Okay, okay...so I faded out the rest of the picture, and left the table alone, JUST so you could see how orange-ish - honey colored it was...


And here it is again in our more updated Living Room...it just doesn't go with any of our other furniture.  I'm not even sure how we inherited this little guy...ha 


And here it is NOW!!!


I basically just did the same exact technique that I did on my Distressed Candle Holders.
I gave the entire table one coat of white (water-based) paint...


See how imperfect it is?


I let that dry, and then added a stain around the edges, and any where else I felt needed some "distressing"...just have fun with it! =)


I went in sections...I would apply the stain, and rub it off almost immediately afterwards.
Here's what it looks like after I rubbed the stain back off...


Now for the fun part!!!...I went around the table, and scuffed it up with sand paper.  Not too much, just a tad bit here and there, mainly around the edges, whatever look you're going for...


See how the table now makes the distressed candle holders POP?! 
The house is slowly starting to have some sort of flow to it...


Thanks for looking! =)

What projects have you guy's been working on this weekend?  Have you done any distressing techniques before?  I would sure love to hear about it.  I'm still learning, and I know there's a bunch of different things you can do with wood!  I would love to try a crackle paint next!

oooo - Jenny


7.06.2012

Distressing!!!...fun!...fun!...fun!

I could definitely go crazy "distressing" wood!  Today was the first time I have tried this technique, and there's something so therapeutic about it.  I can't wait to tackle a piece of furniture, but I thought I'd start small, being that it was my first time.
I've been thinking about what I could do to these candle holders, and decided to go the "distressing" route!  I LOVE how they turned out!

Here's how I bought them:


From Left-To-Right...
Left:  Finished, New, Beautiful Distressed Candle Holder!
Middle:  After sanding down the candle holder, and nailing a piece of wood to the top!
Right:  blah, boring, Old Candle Holder!
(ignore the too big of a lamp shade for the too small of a lamp base...I was experimenting with something. haha)

After nailing on a new piece of wood to the top of the candle holder, I then gave it 1 coat of water-based paint!  It doesn't need to be perfect since you're going for that old distressed look, and you're later going to be staining and sanding it down anyways.


After the paint dried, with a cloth, I dabbed stain around the corners and crevasses of the candle holder...


...and then with the dryer part of your cloth, wipe the stain back off...
It'll still leave a stain tint on there, but it will blend in.
I then took my sand paper again, and scruffed it up a bit.


This process is kind of hard to explain, but I honestly don't think you can go too wrong with distressing!  Maybe that's what is so fun about it, you kind of just play around with it, and don't need to worry about messing up.


Here's a picture of BEFORE and AFTER side-by-side!


oooo - Jenny